Tools > 8BP LEVEL MAKER TUTORIAL
 2
2
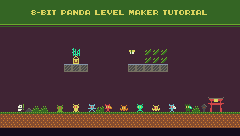
This cart presents some information about how to make levels. It presents the information through sign messages in the game (in the first level). The second level illustrates how water works. The second level doesn't have any signs. You can only use 13 signs in the game, and i had run out of signs in level one.
This tutorial is only understandable if, after playing levels one and two, you look at the map editor, sprite editor, and code. You need to see what the sign messages in the game are referring to.
In the map editor, look at levels one and two. Compare how things look in the map editor to how they look in the game. In the sprite editor, look for the tile numbers that are mentioned in the signs. In the code, search for the things that are mentioned in the signs.
----------------------------------------------------------------------------------------------------------------
Some things about making 8 Bit Panda levels that did not fit in the tutorial:
1) Tiles in the sprite editor are as follows:
-- 0: empty
-- 1-79: static solid blocks
-- 80-127: decorative
-- 128-239: entities
-- 240-255: special markers
2) Special markers are invisible in gameplay.
3) Decorations will work as intended if they are in the tile numbers for entities (128-239), but entities will not work as intended if they are in tile numbers lower than 128.
4) You cannot use the top 8 map pages (the top row, pages 0-7) for levels. When a level loads, it "unpacks" to the top 8 pages, and then "packs" again after it's finished. Therefore, the top 8 map pages must be left empty.
5) Levels can span multiple map pages, but the entire level must be in the same map row.
6) Map page 61 (near bottom right of map editor) has the roads and levels of the world map.
7) Yellow letter A (tile 254) is player starting point at the beggining of the game (player appears one tile above the letter in the map).
8) Yellow letter B (tile 255) is player starting point after saves (one B for each isle (except isle one)).
9) Red numbers (tiles 240-252) adjacent to the B are isle numbers.
10) White numbers (tiles 61,62,63) are level numbers.
11) Red numbers adjacent to the white numbers are isle numbers. (White number 3 with adjacent red number 2 is level 2-3).
12) Levels in the game appear in the order that they are in in the LVL table in the code. For example: the first level in the LVL table will correspond to the level in the map editor that has the white number one with the adjacent red number one.
----------------------------------------------------------------------------------------------------------------
To learn more about 8 Bit Panda, read the original cart's comments and code.
The comments and code on this cart are the same as in the original 8 Bit Panda cart. The only differences are:
1) In the SIGN_MSGS table:
- the sign messages are different
2) At the top of the code:
-added a comment about how to access the debug menu (i didn't create the debug menu; it's in the original game).
-changed the NAME of the game that appears on the title screen
3) In TitleTic function:
-changed the colors of the title screen
-centered the NAME of the game
-commented out the text at the bottom of the title screen that says "github.com/btco/panda"
4) In the LVL table:
-the background colors and palettes of levels 1 and 2
-the length of levels 1, 2, and 3
-the starting points of levels 2 and 3
----------------------------------------------------------------------------------------------------------------
To see the original game, made by Bruno Oliveira (btco), go here:
https://tic80.com/play?cart=188
----------------------------------------------------------------------------------------------------------------
Another good thing to read is an article Oliveira wrote, which can be accessed through a link on the 8 Bit Panda github page: https://github.com/btco/panda
Comments
 Skeptim
|
I just had a quick look but that's cool! Making a level of an existing game could be a good way to start with TIC-80, especially for children. I think you should put it on the wiki Tutorials page https://github.com/nesbox/TIC-80/wiki/tutorials with other tutorials you made.
|